Pamblanco Painting logo.

Category: Residential Painting

Paint for Interior Doors

Painting Interior Door BlueThe simplest way to increase the value of your home is by painting. Invest in a few cans of paint, and you can see a $2,001 increase in value or 107% return on investment.

Interior doors take quite a lot of abuse due to handling and can show signs of wear and tear. A new coat of paint to your doors can brighten the room and bring about a pleasant and bright look. But it is not as easy as that.

This article takes you through the entire process of painting your interior doors, the right paints, finishes, colors, trends, and much more.

Paint Finish for Interior Doors

Interior doors take a lot of use worse than any other surface of your home. As such, the sheen you choose should stand up to the years and not show it.

Semigloss is the best paint finish for interior doors and trim. The reason being, semi-gloss can take up quite an abuse and stand up to nicks and scrapes better than any other sheen, flat or eggshell finish.

The large surfaces gather dust just like your furniture. So, make sure that the paint is easier to clean and hold better with frequent cleaning.

The glossy sheen of the paint makes it easier for the architectural details of the trims and the doors to stand up against the relatively flat nature of the walls.

Best Paints for Interior Doors and Trim

Here are the best paints available for interior doors:

Diamond Brite Paint 31000 – Easy to apply with brush, roller, or even sprayer and 6-8 hours drying time.

Glidden Premium HDGWN52D – A budget-friendly version with the same quality as expensive paint

Rust-Oleum’s 7798502 – Rust and corrosion resistant; Perfect for all surfaces including wood, concrete, masonry, metal, etc.

KILZ 2 Multi-Surface – Dries in about 30 minutes and can be used over old doors before you repaint.

Can I Use the Same Paint for Doors and Trim?

Yes! You can use the same paint for doors and trim especially if it matches the walls. Interior designers apply this little trick for smaller rooms to make them look spacious. However, if you’d like some contrast, paint the trim a shade darker than the door.

Contrastingly, you can also go with different shades for your trim and door. In that case, make sure that your door is of the appropriate color and finish since you’d be drawing attention towards it.

What’s Better: Satin Paint Finish vs. Semi-Gloss Paint Finish

While both the paint finishes have been used on doors, the semi-gloss finish seems to hold up better concerning cleaning and lifespan. The gloss gives a subtle shine, breaking the flatness and monotony of the walls.

Though the former also has a shine and easy to clean, they are not as much as the semi-gloss paint finish.

Interior Doors: Semi-Gloss Finish vs. High Gloss Finish

Interior doors take quite a lot of use and hence need paint that offers resilience. High gloss paint is the most hard-wearing paint of all, tough and washable too. They are the easiest to clean, with semi-gloss coming a close second.

However, on the downside, its reflective nature highlights all the flaws on the surface.

On the other hand, a semi-gloss finish has properties similar to the high gloss finish but is not as reflective and a little forgiving. If your doors have dings and dents, or even otherwise, a semi-gloss finish is the better option.

Upon comparing both the paint finishes, semi-gloss looks to be the perfect finish for interior doors.

What’s Better: Latex Paint vs. Oil Based Paint

Latex paints are easier paints to work with and perfect for indoor use due to the low VOC content. Even though they dry pretty fast, they are not nearly as long-lasting and not particularly durable as well. This makes latex paint ideal for use on walls, ceilings, etc., but not on doors or furniture.

Oil-based paints, on the other hand, works well on wood. So, they are best used on doors and trims. Though they dry slow and need at least 8 hours between coats, they are long-lasting. On the downside, they may have high VOC content, which makes it inappropriate for use indoors.

However, to circumvent this problem, you need to get oil-based paint particularly formulated for indoor use.

On comparing both for doors and woodwork, oil-based paints win hands down.

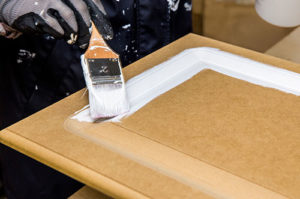
How to Paint Interior Doors

Ensure that you do the following things before painting interior doors:

  • You remove all the door hardware, like doorknobs.
  • Cover the hinges with painter’s tape.
  • Paint in a well-ventilated area.
  • Before the paint job, clean with a degreasing cleaner.
  • Fill the holes and repair imperfections.
  • Lightly sand with 120-grit sandpaper to remove the previous paint job.
  • Clean and dust the area.
  • Put down a rag to catch the drips.
  • A brush may be more effective for panel doors.

Most doors are heavy and difficult to remove and carry. The easiest way to paint a door is while it is this still attached. Follow the below method when painting a panel door:

  • Start by painting the inside of the top panels. Coat the recessed areas first and then move to the faces.
  • Paint the vertical stiles and then the center stiles. Finally, blend in the brush strokes.
  • Continue with painting the rails, starting with the top rail and working towards the bottom.
  • Paint the edge at the last while making sure you do not get any runs when painting the face of the door.
  • Once the paint is dry, do another coat for a uniform appearance.

Professional Tip: You tend to get better results if you paint the door unattached.

Painting an Unattached Door

Painting an unattached door is easy, particularly if you are a beginner. It prevents drips and runs, especially when painting the edge.

  • Painting an Unattached DoorRemove the door from its hinges and place it on a sawhorse.
  • Coat the edge first and then move onto the panels.
  • When painting the face of the door, start with the recessed areas, continue onto the horizontal rails. And finish with the vertical stiles.
  • Let the paint dry completely, and then flip it over to paint the opposite side.

Which Is Better to Paint Doors: Brush or Roller?

Both brush and roller have their advantages when it comes to painting doors.

A roller is obviously the better option for flat doors since it goes smooth, leaving minimum stippling behind. On the other hand, for a panel door, reach for a brush. Or you can use a combination of both.

Use the roller for the center and an angled brush for the sides recessed areas. Finally, use a brush to smooth out the roller stipple. This results in a smooth and uniform look.

However, a brush gives a hand-painted finish.

How to Paint a Door without Brush Marks

The most important thing about painting without brush marks is to sand in-between each coat. It removes the brush strokes from the previous coat and allows the next one to go smooth.

Do not go hard; just gentle scuffing to make it a little smoother. Remember, you can always touch up the spots. Load the tip of the brush with a little paint and dab the area lightly.

When painting, holds your brush at an angle and straight. Another tip from the painters is to dip the brush in water first and then the paint.

Paint the Interior Door in Two Different Colors

Painting the door in two colors is something of a trend right now. Here are some fool-proof tip or two to help you rock the dual-tone trend:

  • Paint the edge that opens the same shade as the side that opens into the room.
  • Paint the edge on the side of the hinges to be the same shade as the other side of the door.

Tips for Painting Interior Doors

Everything from the color selection to the tools and your painting technique impacts the final finish of the door. Here are some professional painting tips from painters to get a smooth and beautiful door.

  • Ascertain the old paint type to help determine the use of a primer.
  • Consider sunny and outlandish colors to give a visual shake-up.
  • If your door is white or another light neutral, paint both the door and the trim in the same shade.
  • If your door is of a darker shade, go for an off-white or neutral trim.
  • Paint your trim first and let them dry for 24 hours. Apply masking tape and protect the trim first before painting.
  • Prep the surface by filling in the cracks with a wood filler and a putty knife.
  • Finish the paint job in one sitting

Note: Determine the presence of lead. Lead, if absorbed by the body, leads to organ damage and brain damage. Call the National Lead Information Hotline at 1-800-424-LEAD, and they can safely remove the lead.

Paint Colors for Interior Doors

Painting interior doors haven’t been a trend for long. The color of your interior door depends on how much focus you want on the door. If you do not wish to call attention to the door, pick white.

But if you are painting the interior door a different hue, choose from your decor. That way, you have a cohesive feel to your home.

The choice of color of your interior door depends on the theme you have going indoors.

  • Black
  • Aqua blue
  • Deep blue
  • Grey

are the most common colors. Nevertheless, ensure that you carry the theme to your furnishings and make the flow look seamless.

Can I Paint the Door Frame the Same Color as the Interior Doors?

While that’s the case generally, your door frame and door need not match. The color of both areas depends on your personal taste and the look you have got going inside your home.

You can have the door frame match your wall and have a different door making it the focus of attention. Or you could have it different from the wall and the door. In that case, it should be neutral, like white.

Tips to Choose Interior Door Color

Tips to Choose Interior Door ColorInterior doors need not feature architecture to make a style statement. Here are some tips for painting interior doors for a trendy and classy look:

  • For a sleek and seamless look, paint the walls, trim, and door in the same color.
  • For a dual-color door, paint the edge depending on how the door opens and how long it stays open.
  • Neutral tones such as black, white, tan, taupe, beige, and grey go with both light and dark walls.
  • For a door with brilliant architectural details, paint in a subtle two shades darker or lighter than the room.
  • For wallpapered rooms, choose a dark color from the paper for the door and the lightest shade for the trim.

Conclusion

Interior doors have never garnered much attention as it has in the last five years. While before it was a classic white to match the walls, it moved to neutrals and even bright and sunny hues.

However, it is not just about the shade but also about the finish. The much-preferred paint finishes are high gloss and semi-gloss. Since high gloss highlights every fault and flaw, semi-gloss wins hands down.

The tools of the trade also impact the look and feel of the door. Even an experienced and skilled painter cannot match the perfection of spray paint, making it the best option. However, it is not ideal to spray-paint a door when it is still attached. Considering all these, the better option is the brush for a panel door and roller for the flat door.

Pamblanco Painting Contractors is a family-owned and operated residential and commercial painting business and has been providing painting services since 1993. Get your free quote today!

How Much Does Residential Painting Cost?

Residential Painting CostPainting your homes with the help of the right painters is one of the best ways to revamp the look of your abode. It is undeniably the best way to give your home an extraordinary appearance and add colorful effects to it. Overall, good paint adds to the aesthetics of your home and often increases the value of your home as well. Therefore investing your time in finding the right residential painter becomes essential.

Most people get positively overwhelmed by the idea of painting their houses. They make big decisions on their own without consulting with experts. As a result, they make huge mistakes like choosing the wrong color, skipping the primer, and neglecting to set aside enough budget. Therefore, we always recommend that you find a professional painter to paint your home.

While looking for good painters, you must always pay attention to the ideal rates. So, what should be the perfect cost of residential painting? To find out how much residential painting costs, continue reading this post.

Ideal Cost of Residential Painting

Interior Painting

Painting homes in a perfect way is a labor-intensive task. We can only trust people with excellent skills, expertise, and experience in this case. Generally, the painters charge based on square footage. Let’s suppose you have a home around 2,300 square feet, while the average cost of painting your house ranges from $2 – $6 per square foot

The average range is anywhere from $5,000 to $11,000 to paint the entire interior of the house. The majority of the homeowners in the US pay around $7,000 on average.

To learn more about the internal painting, refer to this article.

Exterior Painting

External Painting is essential to boost the curb appeal of your house. An excellent exterior paint enhances the look of the home and protects it from extreme weather to which it is exposed. Experts recommend that one should choose a dry or warm season for exterior painting. It is also recommended that one must go for dark colors to paint the exterior since light colors tend to fade away during rainy seasons.

The cost of painting an average home’s exterior in the US usually ranges between $1,700 to $4,000. This brings the average price per square foot to $0.50 – $3.30. Some other factors also play a vital role in determining the cost of painting.

Significant Factors Affecting Residential Painting Cost

Apart from the above numbers, certain essential factors play a crucial role in deciding the cost of the painting job. Knowing which factors influence painting cost will help you set more realistic goals once the painters get started.

Project Size

You already know that the bigger the project (i.e. size (square footage) of the area that needs to be painted), the more it will cost to get professional services. Do you want your bedroom to be painted? Or is it just the exterior of the house? 

The amount of area you want to get painted will be one of the most significant factors in determining your overall cost.

Also, some areas of your home will be harder to paint on or around as compared to other areas. For example, some homes might have a lot of obstacles that make the job of the painter even harder. Obstacles like large evergreen bushes, pergolas, arbors, retractable awnings, and steeply sloping ground. These types of obstacles will make your residential painting even more expensive.

Paint Quality

Paint quality is also an essential element when it comes to the cost of painting your house. There are several paint brands to choose from. Each brand offers a quality of different grade. 

We recommend that you always go with the highest-quality paints since they are more durable. Low-quality paints easily peel off and fade away over time. True, higher-quality paints would cost you a lot more initially than lower-standard paints, but since they outlast the sub-standard paints, you will save money over the long term.  

Preparations

Painting Prep Affecting Residential Painting Cost - Woman Applying Painter's Tape to Trim
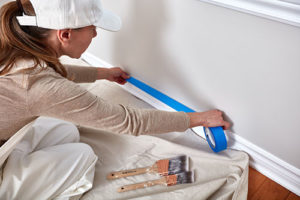
Another major cost determinant is the amount of preparation work that needs to be done. Painters will always make sure that preparations are taken into consideration while estimating the cost.

Wall with cracks, chipped paint, warping, or molds would demand time to be fixed. Fixing these issues involves a lot of work therefore, such a project will require you to set aside an extensive budget.

You can also refer to this article for more information on preparations.

Getting the Best Value for Your Money

If you think about the above essential factors, it would be best to find professional painting companies, and they will perfectly take care of their work. The highly-skilled painters based in good companies will surely give you the best quality work while keeping the costs reasonable.

Frequently Asked QuestionsPeople Also Ask

  • How much does it cost to hire someone to paint the interior of a 2,500 square-foot house?
    • The average cost of painting the interior of a 2,500 square-foot home would probably cost you around $5,500. 
  • How much does it cost to paint a 12×12 room?
    • The average charge of painting a 12×12 room will cost you about $400 to $900. 
  • How long does it take to paint a three-bedroom house?
    • To properly paint a medium-sized bedroom, painters take around four to five hours easily. This includes multiple things like taping the edges, covering the floor and prepping the surface. So for three medium-sized bedrooms, it would take around 14-15 hours. If you wish to paint the trims as well, then this would add an extra 4 to 5 hours to paint all three rooms. 
  • How do painters calculate square footage for your painting estimate?
    • Painters simply multiply the length of each room in your home by their corresponding width to get the total amount of square footage in a particular space. 

Conclusion

After reading this post, you can assume that painting correctly is not as easy as it seems. There are a lot of essential factors that you must pay attention to before hiring Painters to do their jobs. Selecting high-quality paints is extremely important to make sure that the Paint doesn’t fade away quickly. A lot of people get confused when it comes to choosing the perfect color for their houses. 

There is an endless number of brands that sell paint, which might get you dizzy, so to tackle this situation, get in touch with Pamblanco Painting, which is probably the best company in Tuscon that aids people in entirely painting their houses. Get your free quote today!

Low Temperature Exterior Painting

Low Temperature Exterior Painting

Low Temperature Exterior Painting

Did you know that the US collectively use 1.57 billion gallons of paint each year?

Painting the exterior of your home is dreaded by many and for the right reasons. It is a painstaking task that takes days, if not weeks, of planning and preparations to get it painted. In many cases, you may have to hire a contractor for the task.

But not every season is apt for exterior painting. For it to last its life expectancy of 5-10 years, you may have to paint at the right weather and temperature.

We bring you a professional exterior painting guide with the right temperature, climate, and humidity, expert painting tips, and many more.

Appropriate Weather for Low Temperature Exterior Painting

The ideal weather for painting is the dry weather, particularly early summer and early fall, without any significant temperature fluctuations between day and night. The steady temperature helps the paint to go on smoothly and also dry quickly.

If you have a sudden drop in temperatures at night, the paint will not have time to react and cure properly. Also, the weather should remain the same for a few days before and after the paint job.

The same is the case for rainy days. Do not plan exterior painting of your office or home if it has rained in the last few days or if you are anticipating rain.

Outdoor Temperature Range for Exterior Paint

The temperature range for exterior painting depends on the type of paint: oil-based or water-based paint. As a rule of thumb, for oil-based paint, the temperatures should be between 40°- 90° F, and for latex paint, it should be between 50- 85° F.

Ideally, considering everything, the best paint for the exterior is latex, with temperatures ranging between 60-85° F. with little to no wind. As for humidity, it should be within 40%-70%.

Too high or too low temperatures cause the paint to crack and peel off within a few days.

Exterior Painting in Cold Weather

Temperature is one of the factors that play a vital role in the paint bonding to the surface. And as such, winter may actually be a good time to paint your house since the days are dry with low humidity.

As for the paint reacting with the surface, go for water-resistant paints formulated for cold weather. They can be used in temperatures as low as 35° F. It’s not the daytime temperature that matters but the night time, which means your overnight low should be 35° F or higher.

How To: Paint in Cold Weather

The dry air quality and the cold weather make winter an ideal time for your painting projects, provided that you have latex paint designed for use in temperatures as low as 35° F. If not, go for oil-based paints since they do not freeze in lower temperatures.

Here are the steps you need to take to make sure the paint goes on smoothly:

  • Make sure that you have self-priming paint. If not, first go over the surface with a bonding primer and then the paint.
  • Pay attention to the surface temperatures. Wait until it has reached the minimum temperature. The air temperature may not be the same as that of the surface you are painting on.
  • Also, keep an eye on the wind speed and direction. They can directly impact the temperature of the substrate.
  • Ensure that the paint and the tools are suitable for cold temperatures.

Latex Paints not Formulated for Low Temperature Exterior Painting

In case you haven’t been able to procure paints with lower curing temperatures, you can continue with your painting. Here are a few additional steps you would have to ensure a smooth process:

  • The surface temperature should be 50°F. If not, you can use a hairdryer or heat gun to heat the area.
  • If the air temperature is not yet 50 degrees F, you may want to build your bubble similar to a greenhouse.
  • Build a 2×4 structure and cover it with a sheet of plastic. Run a space heater inside to warm the area. Paint inside the heated area and leave the heater running for a few more hours. Keep in mind that you need to maintain the temperature.
  • Add appropriate additives to prevent it from getting thick in the cold.

Low Temperature Exterior Painting Tips For Your Home

Here are a few tips to get the best out of your exterior paint during the cold weather.

  • Paints can undergo multiple freeze-thaw cycles and be reusable on the condition that it isn’t lumpy.
  • Lower the temperature and longer is the drying time between coats.
  • Timing is the key. Work in the mid-day between 10 am to 2 pm to better utilize the sunlight.
  • Track the sun around the house and restrict it to the area that is receiving direct sunlight.
  • Allow for more drying time than that of summer.

Never Paint Your Home in These 3 Weather Conditions

Depending on your paint, the ideal painting conditions can range between 35-85° F. But then again, the paints should either be acrylic or latex paints formulated for cold weather. Other than those, here are some weather conditions during which you should never paint your house.

  • Freezing conditions and lower temperatures below 35°F Do not repaint before the painted area is dry.
  • Do not paint on wet substrates. Keep an eye out for the moisture content before painting.
  • Too hot isn’t ideal either. Your paint would be dry before it cures, leading to cracks. So, avoid painting in the sun.

Influence of Temperature and Humidity In Low Temperature Exterior Painting

High humid conditions can lead to surfactant leaching, which is the white or brown discoloration you see on the top of the paint. It also compromises its protective properties.

If painting on a wood surface, the wood absorbs the moisture content from the air, affecting the adhesion and increasing the drying time.

Similarly, lower temperatures also affect the drying since the paint thickens in cold weather, making it difficult to apply. Contrarily in high temperatures, the paint dries quickly, leaving bumps, blisters, cracking, and discoloration.

Conclusion

Painting your house is a huge undertaking that needs proper planning, starting with the weather conditions. Early summer and early fall are the ideal seasons to paint your house.

But, unlike the common misconception, exterior painting can be done in winter, too, provided you use water-based latex paint formulated for cold weather.

Make sure you keep an eye on the weather forecast for rains or cold fluctuations. They can affect the curing process and leads to cracks, blisters, and peeling paint.

Which Exterior Paint Lasts the Longest?

Which Exterior Paint Lasts the longestAcrylic paint is the best paint to use for exterior painting projects because it has the highest durability. Acrylic paint can also resist extreme weather conditions for quite some time. It also maintains it’s pigment over time so you won’t have to worry about fading.

Exterior paint is a category that many people get stressed out about, even when merely planning a new paint job. You can’t just use any paint on your home’s exterior; it’s vital to choose the correct type of paint for your exterior to avoid any issues lasting over time.

Spending a lot of money just to be met with a paint job that fades or loses it’s color easily is something no one wants. It would be best if you took the time to thoroughly go through all of the options available on the market before choosing which paint you’re going to use for your exterior.

Factors to consider for exterior paint

One of the primary factors to consider when deciding what paint is best for your exterior is how long it is. The good news is that there are plenty of paint options out there that last incredibly long on exterior finishing.

Take a look below to find out more about which paints last the longest on exterior walls.

Which exterior paint lasts the longest?

As per the industry standard for professional painters, acrylic paint is the best type of paint on exterior finishing materials. Acrylic paint lasts the longest and is also known for resisting all sorts of damage caused by weather and other natural variables.

Acrylic paint is also excellent for resisting fading or damage caused by exposure to the sun, making it perfect for homes located in hot regions or climates. Eggshell paints are also known for lasting an extremely long time on exterior surfaces, which makes then another great choice.
The color of paint you decide to go with will also play a huge role in determining how long it lasts. Light colors tend to last for much longer than darker colors because they have minimal pigment.

Choosing the right exterior paint

If you’re having trouble deciding which exterior paint will last the longest, consider getting a professional opinion by visiting a home renovation store like Home Depot or Lowes. You can also contact a professional exterior painting company to help you get the desired results from your painting project.

As long as you follow these simple tips and maintain a clean exterior home appearance, you will make your paint last a very long time.

People Also Ask

Q: How long does Sherwin Williams exterior paint last?
A: Sherwin Williams exterior paint typically lasts about 5-7 years. Of course, this is just the standard assumption and does not, in a way, give you an accurate idea of how long your paint will last as it relates to your specific application.

Q: Is it better to spray or brush exterior paint?
A: brushing, if you were to choose a spray method application for your exterior paint, you would use three times the paint. Not all particles atomized by the sprayer will make their way onto your home’s exterior, which results in more paint required than brushing.

Q: What is the best exterior paint for the money?
A: the two best exterior paints for the money are: Rust-Oleum Zinsser PermaWhite Exterior Paint and Behr Premium Plus Ultra Exterior Paint and Primer in One.

Understanding which exterior paint lasts the longest

You can use all of the information in this article to assist in making the right decision about which exterior paint lasts the longest. Make sure you read through all of the above sections. Before making your final decision, ask yourself these two questions: “What material is used on my home’s exterior finish?” and “What weather variables have the highest odds of ruining my exterior paint job over time?” Contact Pamblanco Painting for all your commercial and residential painting needs.

How Do You Prepare Drywall for Painting?

Drywall must be primed before it can be painted to ensure that the paint stays on and isn't affected by temperature changes in the room or environment.
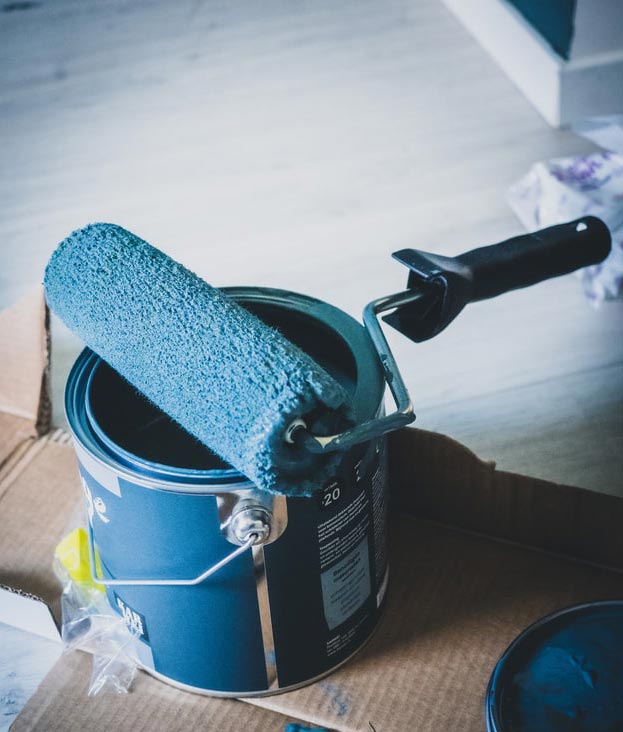
Drywall must be primed before it can be painted to ensure that the paint stays on and isn’t affected by temperature changes in the room or environment. To prime your drywall, you need to clean it first by sanding it, vacuuming it, and rubbing it down with a black cloth to ensure that all dust is gone. Once that’s complete, you can begin applying primer to your drywall so that you can ensure that your paint stays in place for a long time.

If you recently made some renovations to your home and had to install new drywall, the odds are you’re trying to figure out how to decorate your interior space. As all homeowners know, one of the most uncomplicated home renovations you can make is adding new paint to your walls. Painting standard walls is a relatively easy process that doesn’t require an extensive amount of prior knowledge or training to do so.

However, when it comes to painting drywall, there are several steps and procedures you must go through to prepare your drywall. If you’re interested in learning more about how to prepare your drywall to be painted, you’ve come to the right place.
Below, we’re going to give you a detailed rundown of all the critical facts you need to know about preparing and painting drywall.

Preparing your drywall to be painted

To ensure that you get optimal results when painting your drywall, you need to take a few important steps. The process involved with preparing your drywall is simple; however, it is very intuitive, so you need to make sure that you read the following instructions carefully.

Steps for preparing your drywall to be painted:

⦁ Step 1- Inspect your drywall to see if there are any gouges or dings in it. If you do find any gouges in your drywall, fill them in using drywall mud or another paste solution.

⦁ Step 2- Sand your drywall using a pole sander to smoothen the surface.

⦁ Step 3- Remove dust from your drywall using the suction attachment on your vacuum. Then, take a black towel and run it over the wall, if you see any dust left on the cloth, vacuum your drywall again.

⦁ Step 4- Mix 1 cup of white vinegar into a bucket with one gallon of water and soak a sponge in the mixture. Take the sponge and begin washing your drywall; if the water contained in your bucket turns dark before you are finished cleaning the wall, you need to make a new solution and repeat the process.

⦁ Step 5- Take a fan on the highest speed setting and let it sit directly against the freshly washed drywall. Your drywall needs to be bone dry before you apply any paint to it.

Once you’ve completed all of these steps, you can begin the process of painting your drywall.

What to expect when painting your drywall

Before you paint your drywall, you need to apply a coat of primer to ensure that your paint will go on smooth and remain adhered to the surface of your wall for a long time without peeling. Before applying your primer, take a black cloth and go over the surface to make sure no dust is left behind.

The best primer to use for drywall is a latex-based primer; this will give you walls a polished look while also protecting them from easy damage due to small knicks or dings. A high-quality primer will also help you paint absorb more evenly in your walls after you’re finished painting them.

Start applying your primer to the drywall in small strokes until the entire wall is covered. After that’s complete, let your primer dry and take your hand over the surface of your drywall to ensure that there is on dust particles left over.

People Also Ask

Q: Can I paint directly on drywall?
A: No, after you are done hanging your drywall, you need to make sure that you mud and primer it before applying any coat of paint. After all of those steps have been complete, you can begin the process of painting your drywall.

Q: What kind of paint do you use for drywall?
A: The best type of paint to use on new drywall is a premium acrylic latex primer. If you’re painting over drywall that has been painted before, you should switch to using a stain-blocking primer to remove any scratches or imperfections which may be present. To top it all off, you should paint your drywall with acrylic latex paint.

Q: What happens if you don’t prime drywall before painting?
A: if you fail to prime your drywall before painting it, you will risk the paint peeling in humid or even worse conditions. This is why it’s so important to prime your drywall before applying any paint coating.

The information in this blog can help you learn How to prepare drywall for painting

All of the information we’ve given you in this article can be used to help you correctly prepare your drywall for the painting process. Make sure you follow all of the tips and tricks we’ve detailed in the write-up so you can paint your drywall like a professional.

Exterior Paint Colors that Repel Bugs

Exterior Paint colors that repel bugsSmall insects, birds, and bugs are very responsive to colors due to their limited sensory function. If you have a problem with them ingesting your outdoor spaces, you can use colors such as yellow and blue to repel them. Certain colors work better on specific bugs, so you need to know what problem you’re dealing with prior to re-painting your property exterior.

If you live in an area that has a massive problem with bugs or small insects attacking people’s property, there is an unlikely solution that can also add style to your home. For a long time, people have been using colors as a way to manipulate the behavior of animals. Our human brains have been proven to have certain phycological reactions when it recognizes specific colors, so it’s no wonder animals are also sensitive to color.

An example of this would be the long-standing practice that to get a bull agitated, you must flash some sort of red cloth in front of them. Well, you may be surprised at how effective using specific exterior paint colors are at repelling birds and insects.

If you’re interested in learning about how the use of specific colors can safeguard your property from insect infestation, continue reading to find out more.

What are Exterior Paint Colors That Repel Bugs?

It’s common knowledge that birds and insects have limited sensory capabilities. Many of them rely solely on eyesight, and even then, they don’t experience color in the same way that we do. They are very sensitive to particular colors as they are often associated with their natural predatory enemy in the wild or something similar.

Depending on the type of bug or animal that you are trying to repel, specific colors will be more effective than others. Here is a list of the best colors to use when you want to repel bugs or animals according to their species.

Best Exterior Paint Colors That Repel Bugs & birds:

  • Birds- birds hate the color white and tend to avoid it when possible—virtually all shades of white trigger danger signals in birds, which is why they tend to avoid it.
  • Bugs- shades of green and blue do not register well with birds on the UV spectrum, which causes them to avoid these colors when they see them.
  • Mosquitoes- mosquitoes can see dark colors very easily, which is why you want to choose bright colors to repel them. Colors such as yellow and white will do a much better job of deterring mosquitoes from your property.

These are the most striking colors that you can use to help repel insects, birds, and small bugs from gathering around your property.

How color affects individual animals

As we mentioned earlier, every bird and bug reacts to specific colors differently. Before being able to decide on what exterior colors you should use, you will need to figure out the type of small animal or bug that’s giving you the most trouble. This will ensure that you get effective results from painting your property’s exterior of a particular color.

Specific colors trigger an emotional response in insects and small bugs, such as fear or uncertainty. These are the type of triggers that will ensure small insects stay away from your home.

People Also Ask

What color do flies hate?

Flies seem to be really repulsed at the sight of the color yellow, so if you want to get rid of them quickly, it’s probably the best color to go with.

What colors do not attract bugs?

Some bugs can’t see full colors due to the way their eyes react to the UV spectrum. These colors are common in warmer tones such as red, yellow, and orange.

What colors are birds afraid of?

Birds are scared of colors such as black, yellow, and white as they have been known to keep birds from congregating in gardens.

Conclusion

You can use all of the tips and information that we’ve given you access to in this article to avoid the hassle of insects or birds dominating your home’s exterior spaces.